
You’ve seen it happen: you frame a stunning landscape at sunset, the sky ablaze with color, only to review your shot and find the foreground rocks reduced to featureless black silhouettes—or worse, a properly exposed foreground beneath a blown-out white sky. This frustration stems from a fundamental camera specification called dynamic range: your sensor’s ability to capture detail in both the brightest highlights and deepest shadows simultaneously. Understanding dynamic range—measured in “stops” representing the span between pure black and pure white—transforms how you approach exposure decisions, choose camera gear, and rescue challenging shots in post-processing. This guide breaks down the technology behind dynamic range, reveals which cameras excel at capturing wide tonal ranges, and shares practical techniques that help you work with (or around) your sensor’s limitations.
What Is Dynamic Range and How Is It Measured?
When you point your camera at a sunset scene with dark foreground rocks and a brilliant sky, you’re asking your sensor to do something challenging: capture both the deepest shadows and the brightest highlights in a single frame. Dynamic range describes exactly this capability—the span between the darkest tones your camera can record with detail and the brightest areas before they blow out to pure white.
Think of it as your camera’s ability to see into shadows while simultaneously not being blinded by bright light. A camera with wider dynamic range preserves texture in a bride’s white dress while maintaining detail in the groom’s black tuxedo, all in the same shot. When dynamic range falls short, you’re forced to choose: expose for the highlights and lose shadow detail, or expose for the shadows and accept blown-out bright areas.
The Stops System Explained
Photographers measure dynamic range in stops, a logarithmic unit borrowed from exposure settings. Each stop represents a doubling or halving of light. Move from ISO 100 to ISO 200? That’s one stop more light sensitivity. Close your aperture from f/2.8 to f/4? One stop less light reaches the sensor.
For dynamic range, a camera rated at 14 stops can capture detail across a brightness range where the brightest point is 16,384 times brighter than the darkest (2 to the power of 14). Modern full-frame cameras typically deliver 12-15 stops of dynamic range at base ISO, with flagship models like the Sony A7R IV achieving 14.8 stops. Smaller sensors lag behind—APS-C cameras usually manage 11-13 stops, while smartphone cameras typically offer 8-11 stops.
Comparing Camera Dynamic Range to Human Vision
Here’s the humbling reality: the human eye perceives roughly 20 stops of dynamic range in a single scene. We can simultaneously see detail in deep shadows and bright highlights without thinking about it. Our visual system constantly adapts, adjusting on the fly as our gaze moves between dark and bright areas.
This gap between human vision and camera sensors explains why scenes that look perfectly balanced to your eye often produce disappointing photos with crushed blacks or blown highlights. It’s why landscape photographers bracket exposures or use graduated filters, and why shooting RAW files matters—those extra 2-3 stops of recoverable information can save an otherwise failed exposure.
How Sensor Size and Technology Affect Dynamic Range
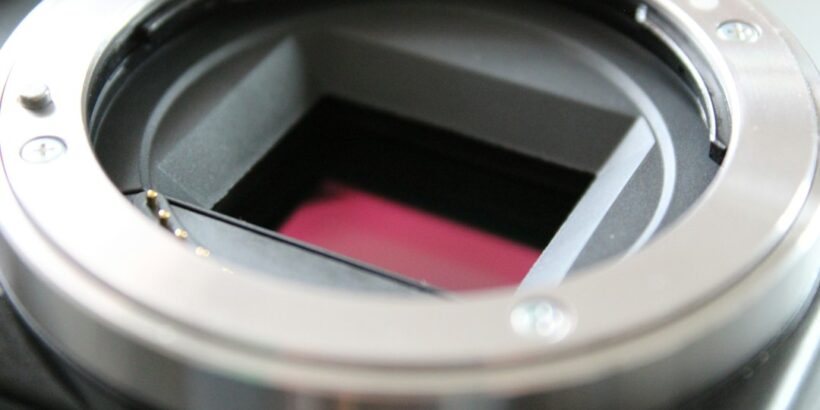
The physical size of a camera sensor fundamentally determines how much light information it can capture. A larger sensor with bigger individual photosites (pixels) collects more photons per exposure, translating directly into superior dynamic range performance. Modern full-frame cameras routinely achieve 12-15 stops of dynamic range, while APS-C sensors typically deliver 11-13 stops under optimal conditions.
Sensor Size: Full-Frame vs APS-C
Full-frame sensors measure 36mm x 24mm, providing roughly 2.5 times the surface area of an APS-C sensor. This size advantage means each pixel can be physically larger when comparing cameras with similar megapixel counts. A 24-megapixel full-frame camera, for instance, will have photosites measuring approximately 6 microns across, compared to about 4 microns on a 24-megapixel APS-C sensor. Those larger pixels gather more light, produce less noise, and retain detail in both highlights and shadows more effectively.
The practical difference shows up immediately when recovering underexposed shadows or pulling back blown highlights in post-processing. A full-frame sensor might cleanly recover 3-4 stops of shadow detail, while an APS-C sensor starts showing objectionable noise after 2-3 stops. This matters most in high-contrast scenes like sunset landscapes or backlit portraits where you need flexibility in editing.
Advanced Sensor Technologies
Beyond raw size, sensor architecture plays a crucial role in dynamic range performance. Back-illuminated (BSI) sensors reposition the wiring and circuitry behind the photodiodes rather than in front of them, allowing more light to reach the photosensitive layer. This design improvement typically adds 1-2 stops of usable dynamic range compared to traditional front-illuminated sensors.
Stacked CMOS sensors take BSI technology further by separating the pixel layer from the processing circuitry entirely, enabling faster readout speeds with minimal noise penalties. Dual gain sensors, found in cameras like the Nikon Z9 and Canon EOS R5, use two different amplification circuits to optimize performance across the ISO range, maintaining exceptional dynamic range even at higher sensitivities where traditional sensors struggle.
The Relationship Between ISO and Dynamic Range
When you increase your camera’s ISO setting, you’re not just making the image brighter—you’re fundamentally altering the sensor’s dynamic range capabilities. The relationship is straightforward but often misunderstood: as ISO climbs, dynamic range shrinks. A modern full-frame camera might deliver 14 stops of dynamic range at ISO 100, but push to ISO 6400 and you’ll typically see that number drop to around 9-10 stops.
Why Higher ISO Reduces Dynamic Range
The mechanism behind this loss centers on signal amplification. Higher ISO doesn’t make your sensor more sensitive to light; instead, it amplifies the electrical signal after light hits the photodiodes. This amplification boosts both the image data you want and the electronic noise you don’t. As a general rule, expect to lose approximately one stop of dynamic range for every two to three stops of ISO increase. At base ISO, your sensor operates in its optimal state, capturing the widest possible tonal range from deep shadows to bright highlights. Crank up to ISO 3200, and those shadows become noisier while highlight headroom diminishes.
ISO Invariance and What It Means for Shooting
Modern sensors, particularly those in cameras from Sony, Nikon, and newer Canon bodies, exhibit what’s called ISO invariance. These sensors maintain relatively consistent performance whether you underexpose at low ISO and brighten in post-processing or shoot at higher ISO in-camera. This characteristic fundamentally changes exposure strategy. With ISO-invariant cameras, you can confidently shoot at ISO 100 even in dim conditions, underexposing to protect highlights, then recover shadow detail during RAW editing without significant penalty. The practical advantage? You preserve maximum dynamic range where it matters most—in the RAW file—giving you greater flexibility when processing challenging high-contrast scenes.
RAW vs JPEG: Preserving Maximum Dynamic Range
The choice between RAW and JPEG isn’t just about file size—it fundamentally determines how much image information you’ll have available when recovering blown highlights or lifting murky shadows. While your camera’s sensor may capture 14 stops of dynamic range, a JPEG file compresses that data into roughly 8 stops of usable information. The missing data is permanently discarded during in-camera processing.
RAW files preserve the full sensor readout, typically providing 2-3 additional stops of recoverable dynamic range compared to JPEGs. This difference becomes critical in high-contrast situations. Imagine photographing a backlit portrait at sunset: with a RAW file, you can pull detail from the shadowed face while simultaneously taming the bright sky. The same JPEG would show blocked-up shadows or clipped highlights with no path to recovery.
Shadow recovery proves far more forgiving than highlight recovery in both formats. Underexposed areas retain signal information that can be amplified during post-processing, though at the cost of increased noise. Modern sensors with strong read noise performance—particularly those exhibiting ISO invariance—make shadow recovery remarkably effective, sometimes retrieving detail from areas that appear completely black in the camera preview.
Clipped highlights present a different challenge entirely. Once pixel values reach maximum capacity (pure white), no data exists to recover. This creates the cardinal rule of exposure: protect your highlights first. RAW files offer a safety buffer here, as the format’s extended headroom often contains highlight detail that the camera’s JPEG preview indicates as blown. Experienced photographers routinely expose to the right (ETTR), deliberately brightening exposures to maximize shadow detail while keeping highlights just shy of clipping—a technique that relies entirely on RAW’s expanded latitude.
Top Cameras for Dynamic Range Performance
When measured under standardized testing conditions, the Sony A7R IV and Nikon D850 consistently top the charts for full-frame cameras, both achieving an impressive 14.8 stops of dynamic range at base ISO. These cameras set the benchmark for 35mm format sensors, offering photographers exceptional latitude for recovering shadow detail and controlling highlights in challenging lighting scenarios.
Medium format cameras push beyond these limits. The Fujifilm GFX 100 II and Hasselblad X2D 100C exceed 15 stops of dynamic range, leveraging their larger sensor area to capture more tonal information. This translates to noticeably smoother gradations in sky-to-shadow transitions and greater flexibility during post-processing, though at a significant price premium over full-frame alternatives.
The performance gap between dedicated cameras and smartphones remains substantial. While modern full-frame cameras deliver 12-15 stops of dynamic range, smartphone sensors typically manage 8-11 stops despite aggressive computational photography techniques. This difference becomes most apparent in high-contrast scenes where smartphones must rely on HDR merging rather than native sensor capability.
| Camera Model | Sensor Format | Dynamic Range | Key Technology |
|---|---|---|---|
| Fujifilm GFX 100 II | Medium Format | 15+ stops | BSI CMOS, 102MP |
| Sony A7R IV | Full-Frame | 14.8 stops | BSI CMOS, 61MP |
| Nikon D850 | Full-Frame | 14.8 stops | BSI CMOS, 45.7MP |
| Panasonic S5 II | Full-Frame | 14+ stops | Dual Native ISO |
| Sony A7S III | Full-Frame | 15+ stops | Dual Native ISO |
Dual native ISO technology, featured in select Panasonic and Sony models, deserves particular attention. These cameras employ two separate analog gain circuits, effectively providing two distinct base ISO settings with minimal noise. The Panasonic S5 II switches between ISO 640 and ISO 4000, while the Sony A7S III uses ISO 640 and ISO 12800, maintaining exceptional dynamic range across a broader ISO spectrum than traditional single-gain architectures.
Practical Techniques for Maximizing Dynamic Range
Your camera’s sensor may capture 12-15 stops of dynamic range, but most scenes don’t require you to push those limits. The real challenge comes when photographing high-contrast situations where bright skies meet dark foregrounds, or when shooting backlit subjects. Here’s how to extract every bit of tonal information your sensor can deliver.
In-Camera Techniques
Always shoot at your camera’s base ISO (typically ISO 100 or 64) when conditions allow. Dynamic range decreases progressively as ISO increases, sometimes losing 1-2 stops at ISO 3200 compared to base ISO. This matters most when you know you’ll need to recover shadow detail in post-processing.
Exposure bracketing becomes essential when a single exposure can’t capture the entire scene. Set your camera to take three or more shots at different exposures (typically -2, 0, +2 stops). This gives you options: either select the best single exposure or merge them into an HDR image. Modern cameras with built-in HDR modes automate this process, though manual bracketing offers more control.
The “expose to the right” (ETTR) technique pushes your histogram toward the highlights without clipping them. Since digital sensors capture more tonal information in brighter areas, this approach maximizes recoverable shadow detail when you darken the image in post. Check your histogram and expose until highlights just touch the right edge—but watch for blown whites in critical areas like skin tones or bright clothing.
Post-Processing Strategies
RAW files are non-negotiable for dynamic range work. They preserve up to 3 additional stops of information compared to JPEGs, giving you far more latitude to recover shadows and tame highlights.
When editing high-contrast images, prioritize highlight recovery first. Blown highlights contain zero data and can’t be restored, while underexposed shadows often retain usable information even when they appear black in-camera. Use your editing software’s highlight and shadow sliders conservatively—pushing shadows more than 2-3 stops introduces visible noise.
For extreme scenes that exceed your camera’s single-shot capabilities, merge bracketed exposures using HDR software or your RAW processor’s HDR merge function. This creates a 32-bit image with extended dynamic range, which you can then tone-map to create a natural-looking final photograph.
When Dynamic Range Really Matters in Photography
Not all photography situations stress a camera’s dynamic range equally. A landscape photographer capturing a sunrise over the Grand Canyon faces a radically different challenge than a studio portrait shooter working with strobes and softboxes.
High dynamic range scenarios where sensor capability becomes critical:
- Landscape photography during golden hour – When you’re shooting a scene with a brilliant sky and shadowed canyon walls, you’re often dealing with 12+ stops of range between the brightest highlights and deepest shadows. Cameras with 14+ stops of dynamic range let you preserve both the pastel sky gradients and rock detail without bracketing exposures.
- Wedding ceremonies in churches – These environments combine the worst lighting challenges: bright windows streaming sunlight while the couple stands in dim ambient light. A camera with strong shadow recovery (10+ stops usable range) means you can expose for the highlights and lift the shadows in post without introducing excessive noise.
- Architectural interiors with windows – The difference between indoor ambient light and outdoor daylight easily spans 10-12 stops. Real estate and architectural photographers working with available light depend heavily on sensors that maintain clean shadow detail when pulling up darker areas.
Lower dynamic range demands where high-end sensors offer diminishing returns:
- Studio photography with controlled lighting – When you’re shaping light with modifiers and controlling ratios, you’re rarely exceeding 6-8 stops of range. A mid-tier APS-C camera performs nearly identically to a flagship full-frame body in these conditions.
- Bright overcast days – Cloudy conditions naturally compress dynamic range to 8-9 stops, well within any modern camera’s capability.
For buyers, match your sensor to your shooting style. If you primarily work outdoors in challenging natural light or shoot events in mixed conditions, prioritize cameras offering 13+ stops of measured dynamic range. Studio and controlled-lighting shooters can focus budget elsewhere.
Working With Your Camera’s Capabilities
Dynamic range represents just one specification among many that determine whether a camera suits your photography. While flagship models boasting 14-15 stops of dynamic range offer measurable advantages in extreme lighting conditions, the reality is that most modern cameras—even mid-range APS-C bodies delivering 11-13 stops—handle the vast majority of real-world shooting situations with grace.
The difference between 13 and 15 stops matters far less than understanding how to work within your specific camera’s capabilities. A photographer who shoots RAW, exposes deliberately to protect highlights, and knows when to bracket exposures will consistently produce better images than someone chasing spec sheets without mastering technique. The tools matter, but knowing how to use them matters more.
Before upgrading your camera body for an extra stop or two of dynamic range, honestly assess your shooting scenarios. Do you regularly encounter high-contrast scenes that push your current sensor’s limits? Are you shooting RAW and using proper exposure technique? Often, the solution to disappointing results lies in workflow adjustments rather than new gear.
Ultimately, dynamic range gives you creative latitude—the freedom to recover a slightly missed exposure or preserve detail across challenging tonal ranges. Modern sensors provide enough headroom for most photographers to focus on composition, timing, and storytelling rather than worrying about technical limitations. Understand what your camera can deliver, learn to work confidently within those boundaries, and you’ll find that 12-15 stops of dynamic range opens far more creative possibilities than it closes.